Step 4 - Calibrating the System


|
Step 4 - Calibrating the System |
|
|
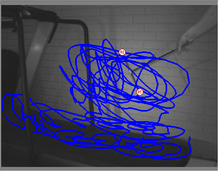
Figure 3 Wand movement as seen from Camera 1
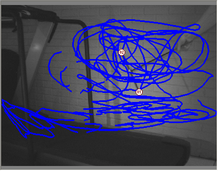
Figure 4 Wand movement as seen from Camera 2
If the calibration was successful, the results will be as shown in Figure 5.
Figure 5 Successful Calibration
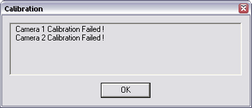
Possible reasons for failed calibration:
|