Tracking


|
Tracking |
|
|
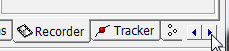
MaxPRO will both record and track at the same time. After recording, you are ready to next complete your tracking setup. To do this, scroll to the right with the arrow buttons to the Tracking tab at the bottom right of the screen.
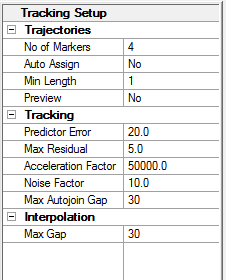
This will open up your Tracking Setup options.
Under your Trajectories, you can use the drop down arrows again to click and pick or type in your own numbers to input the actual number of markers in use. You can choose to let MaxPRO auto-assign your marks in order with the first mark on your list or choose 'No' to assign your own. You can choose your minimum trajectory length in frames (nothing shorter than your choice of frames in length) with the Min Length drop down box, and the Preview feature chooses whether you would like to show the marks in 2D tracking on your screen.
In the next part of the Tracking Setup, under Tracking, you can adjust for your Predictor Error (in a 3D cube or a 2D square, for each frame), your Acceleration Factor (Adjust as needed for faster or slower subject motion), Noise Factor in current system units, and Max Autojoin Gap in number of frames between joined segments.
Lastly you can specify the Maximum Gap in frames that can be interpolated. The default is 30, but you can scroll up or down to change, however any more than 30 can cause inaccuracies in your data.
When you have finished your Tracking Setup for your file, you can go on to identify and analyze, or you can save it as a .moc (motion capture) file.
To open a specific saved file to track, click on the Track file button to open up your list of .moc files.
You are now ready to identify your marks and analyze your data.
|