Identification


|
Identification |
|
|
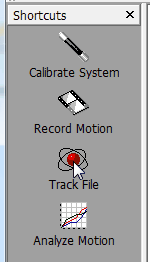
To identify your marks and analyze your data, click on either the Track File or Analyze Motion button to get started. This will open your file browser window. Choose the .moc file you wish to use.
(Note, The Analysis screen is not available in MaxPRO Beta 2.)
You can now see your marks and grid on the graphical view screen along with the playback controls and the list of options for your points.
Starting with the view screen, you can do a number of things to enhance your visuals. For starters, you can left click on any part of the visual to tilt your view. You can right click on any part of the visual to pull it up, down, or side to side. You can also use your mouse wheel to zoom in or out.
You can add simple point and click stick figure imagery by clicking Shift on your graphical screen. This will show you the stick figure tool is active. While holding down the Shift key, click the two marks you would like to link. To delete a stick, mouse over the stick, click on it and hit the delete key.
Beneath the graphical screen are the video controls.
The controls are very simply laid out for you to start, stop, fast forward, rewind, and move backwards or forwards frame by frame. The update rate allows you to run your playback faster or slower while the middle setting is the real time setting. The red line is your current frame indicator and can also be clicked and dragged to run from one frame to another.
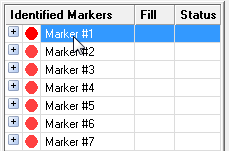
At the bottom right of the screen are the tabs for marker identification.
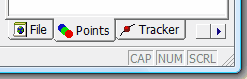
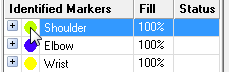
At this point, you have already put in your data regarding the File and Tracking specifics, and are ready to identify or edit your points with the Identified Markers table that is brought up with the Points tab shown.
To identify your marks you can either click on them in the graphical view or in the table.
There are two methods you can use to identify your marks:
You can right click on each marker in your table to bring up a list of options to hide, change color, rename, interpolate, or unidentify your marks.
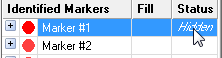
Hide markers by right clicking on the mark in the table and click on Hide or double click on the status field to change status to hidden. Hidden markers can be shown as well with the Show option or double clicking off the hidden status.
You can also change the color of a mark by double-clicking on its color dot in the Identified Markers table and choosing your new color.
You can also change the name of a mark by slowly double clicking on it in the Identified Markers table, or click on it in the table and push the F2 key.
The Unidentify option removes all available segments. You can remove part of a segment by right clicking on it and choose Remove Part or click on the X.
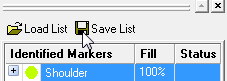
The Load List and Save List buttons above the table allows you to save or load the names, colors, and stick figures of your identified marks. Save List saves your current colors, names, stick figures, etc.
You can save all the data you input for each file by saving it as a MaxPRO .moc motion capture file.
|