Calibration


|
Calibration |
|
|
Once you have your cameras in place, the next step is to calibrate your system.
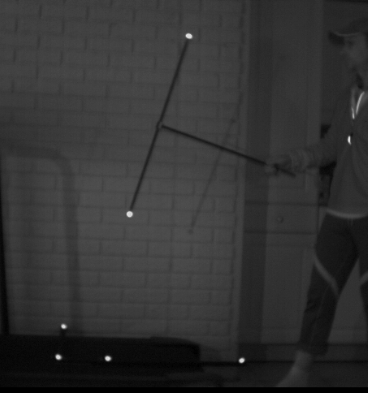
The default type of calibration system MaxPRO uses is a wand kit. A wand kit uses two objects in order to calibrate the system; the calibration wand and the stationary L-structure. The calibration wand is the T-shaped object with two markers set a fixed distance from each other on a rod. The wand is turned by hand within the measurement volume in order for your system to calculate the locations and orientations of your cameras. The L-structure (or sometimes called the "reference object") has four markers attached to it and it remains stationary on the bottom of your measurement volume. The L-structure is used to define the origin and orientation of the coordinate system that you are using with your camera system. Wand calibration kits are available through Innovision Systems or you can make your own. Innovision Systems can also provide instructions for you on how to make your own.
To start, click on the Calibrate System shortcut.
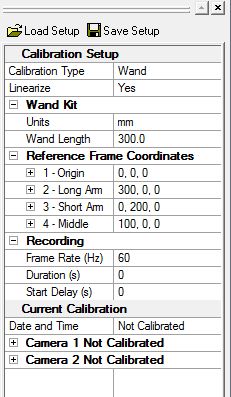
This will open up your Calibration Setup options menu.
The Calibration Setup displays more click and pick drop down boxes for you to choose your options from.
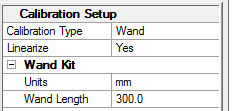
The default size of the wand kit is 300.0 mm, and a size for most applications is 750.0 mm, but if this would be different depending on your application. You can input the size of the wand kit you will be using next to Wand Length. You can also calibrate and linearize your system at the same time with MaxPRO. Just leave the default to "yes" and it does the work for you. MaxPRO's calibration algorithms will then find the reference markers when the calibration recording is made.
The marked L-frame is placed on the bottom of your measurement volume and the wand is slowly twirled throughout the volume area in such a way that all cameras can capture the motion as the system records the motion in order to make its calibrations.
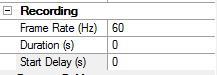
Once your cameras and your calibration system have been set up, you will next need to record the calibration wand in motion in order for the system to calibrate and linearize itself. Input your frame rate, durations in seconds of your recording, and your start delay and record your wand calibration. Normally a calibration is setup for 10 seconds and frame rate is 60 Hz. Start delay is how long you need to hold the recording start time before you begin, as in if you needed to make the recording ourself (you're taking your own "picture" as it were and you need to get into it first).
You will then need to specify your Reference Frame Coordinates. You can manually input these via the drop downs provided or you can have these preset for you by previous arrangement with Innovision Systems, Inc.
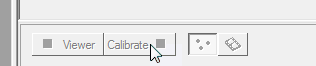
You are now ready to calibrate your system. This can now be done by clicking on the Calibrate button at the bottom of the viewing area.
When MaxPRO is done making it's calibrations, a pop-up window will appear showing your calibration results for each camera and noting whether or not each camera was successfully calibrated. Once you have achieved successful calibration on all cameras, you are ready to begin recording and capturing your application data.
|