Camera Setup


|
Camera Setup |
|
|
2D video analysis can be done with any single camera you choose, including any off-the-shelf brand camcorder. 3D recording can be done with MaxPRO utilizing anywhere from 2 to 32 high speed cameras of your choice. When setting up your cameras around your measurement volume, the usual angle distance between 2 cameras is 60º-90º. For 3 cameras, roughly 45º-60º, and about 60º degrees in a four camera system. This may be variable for systems with more cameras depending on your application. In-line camera systems must also utilize an external triggering device for turning camera signals on or off. The external trigger is connected to the external trig input pin at the control port of your system's master camera (camera 1), which should be your camera connected to your computer.
You can use the external trigger to either delay your capture start, stop your capture, or both. Once your cameras are set up, they must next be calibrated before you can begin recording your data. Camera Setup is accessed via Calibrate System or Record Motion (New Recording).
Your Cameras tab appears on the lower right of your MaxPRO screen.
The number of cameras for 3D analysis has a set default of 2. You can add more cameras by clicking on the default number 2 and scrolling up or down for as many cameras as you have.
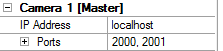
Under each camera number, you have the option of inputting your IP address and Ports. Most users will not need to use these and they can be skipped over.
Next to Camera State, you can use the drop down provided to enable your cameras. You can also use the drop down arrows to click and pick your camera type, camera to use, the size of the sensors you will be using in your analysis, and the focal length of your camera lens.
|